
There are people who can’t get rid of anything long after their usefulness. Even shoe-boxes can’t be parted lest they may be needed someday. For such people, the idea of re-purposing what they have–such as shoe-boxes into something useful, might just be a great idea. So, how about considering some of our 51 ideas for re-purposing shoe-boxes that you don’t need anymore?

51 Shoebox Craft Ideas For Children
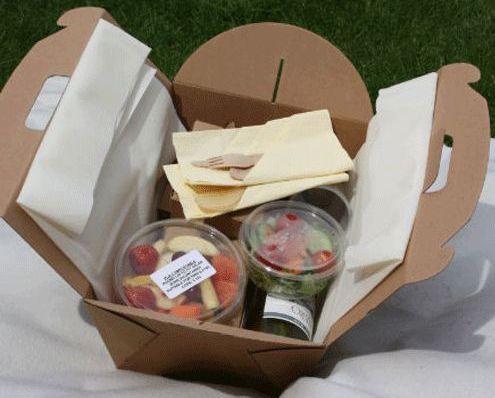
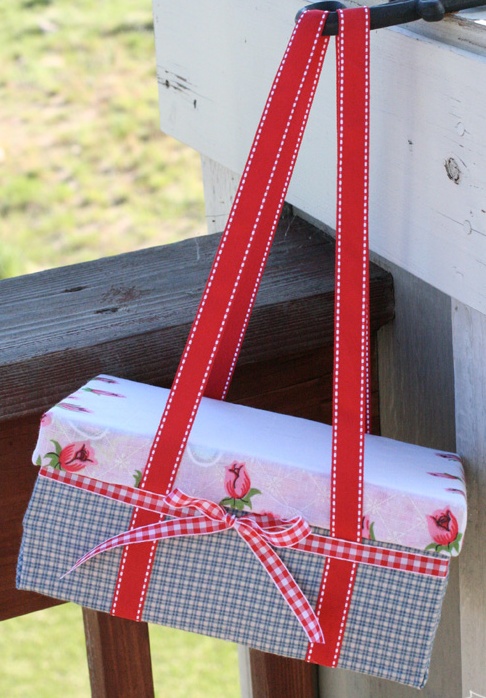
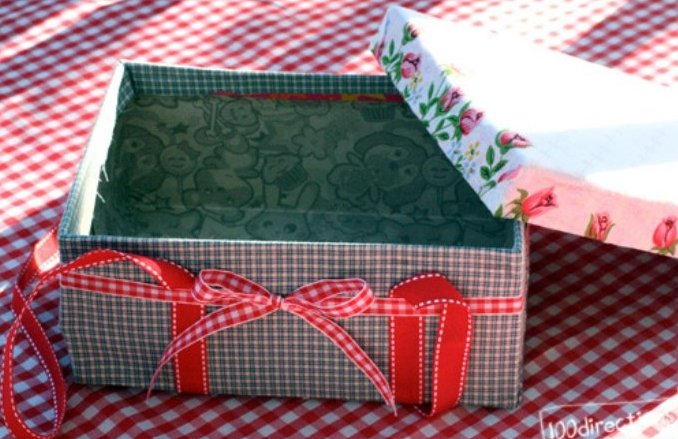
1.Picnic Box
Does today seem like an excellent day for a picnic? You could enjoy your picnic better with a fancy picnic basket by converting an old and forgotten shoebox into a vividly coloured one. To make it, envelop the base of the box with fabric so that it wraps it entirely. Slather glue on all the edges of the box’s surface and then use adhesive to stick two ribbons, starting at the base of the box and going all the way up to the top, wrapping the opposite side and going to the bottom of the box. Leave an inch of ribbon open and unstuck so that the lid fits tightly.
Use another ribbon to wrap the box and stick it, front to back and take care that it overlaps the first ribbon, near the top. Make a bow at the front of the box and cover the lid, stick it and ensure that you have covered the inside of the lid with fabric. You’re free to add as many bells and whistles to your picnic box as you like, after all it’s a fun basket for the whole family.
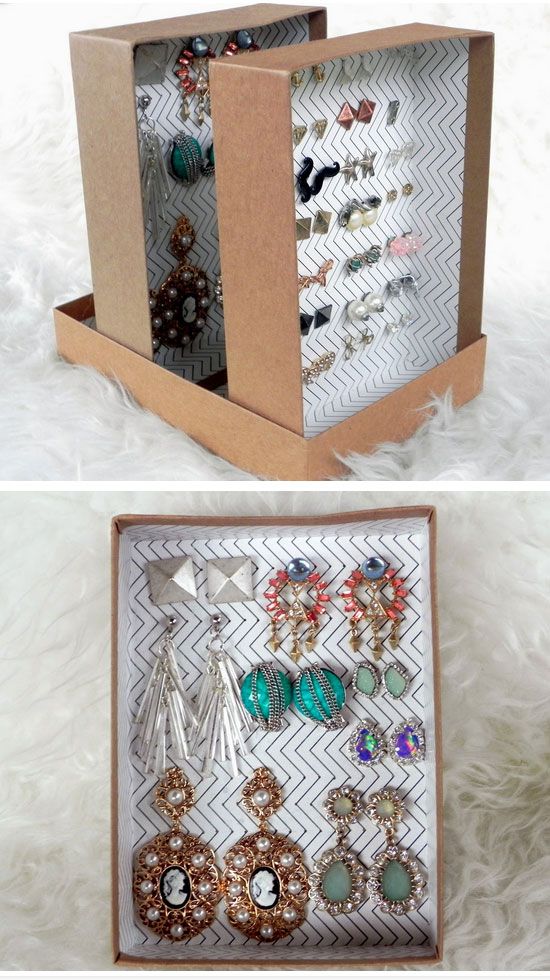
2.Jewelry Organizer
If you’re looking to house all your jewelry in one place, why not do it inexpensively by using an old shoebox? To make one for yourself, begin by measuring the diameter of the bangles or bracelets you want to hang in the box. This will give you the spacing between the pencils which will act as hanging rods in your box. Now, make a few slits on the box with definite spacing, with the help of a craft knife. Arrange the pencils on the slits and your jewelry box is ready to use.
Additionally, you can make a few shallow boxes at the base of the box to house your small bits of jewelry like rings and earrings. You can also stand a large shoebox and place hooks inside it to hang necklaces.
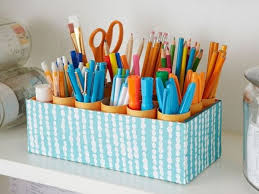
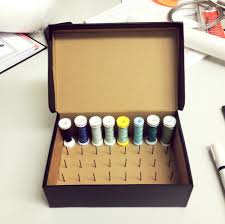
3.Marker Caddy
If you’re an artist but are not completely organized, you need to put away your art supplies carefully and neatly. Or, perhaps you have little kids who are careless with their crayons and pencils. So, here’s an easy to make and use organizer that won’t take up more than 10 minutes of your busy time to make. With the help of an old shoebox and some toilet paper tubes that should be cut to the height of the box, you can make a very attractive and useful caddy for your markers.
Now, stick them inside the box, ensuring they are all upright. There’s no need to glue anything, they will stand by themselves very well.
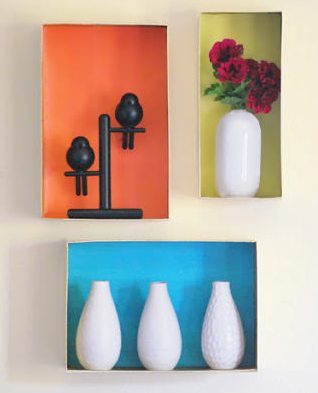
4.Wall Art
You don’t need to have an artistic bent of mind to create some attractive wall art out of an old shoebox. All you need is a little imagination, some bright decorative paper and glue. To begin, cut a piece of fabric that’s enough to go around the lid of your shoebox. Paint the sides and top of the lid in any bright colour. After it dries, paint the entire lid Paint the top and sides of each lid all white to prevent any logos or color showing through. When that is dry, glue the entire lid.
Now, place the lid upside down in the middle of your piece of fabric. Wrap the box in fabric on the sides and top and make it look like a gift-wrapped item. Hold it in place with glue or tape. Tuck the loose ends of the fabric inside the box and hold it securely with tape. Now, turn the lid over and see how attractive it looks. To push in some studs, make a couple of slits with scissors and press the stud’s prongs inside it. Put a stud at each corner and continue to do this until you complete as many panels as you want. Hang your wall art on your wall and admire your effort. You can have just one piece of wall art or a trio–it’s your choice.
5.Boxy Shelves
Use the lid of your shoebox and the box itself to make some wall shelves. It won’t carry much weight, but if you do need to put in something heavy, add a sheet of thick cardboard or some wood to buttress it.
To make a shelf, cut the decorative paper you have to match the size of width of your box. Attach it to the inside of the box so that it fits snugly inside. Now, spray paint the exterior and interior walls of the box and cover it with any decorative logos you have. Once dry, attach the box to the wall using a nail and screwdriver. To increase its sturdiness, screw yet another nail on the other side of the box. Stick the back of the box with the paper and attach it to the inside walls of the box. Your boxy shelf is ready.
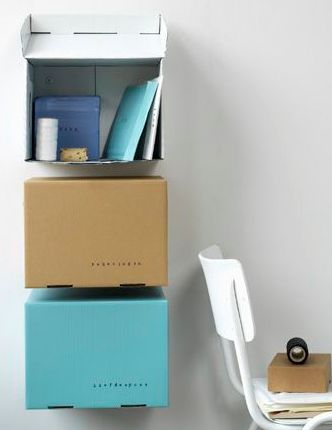
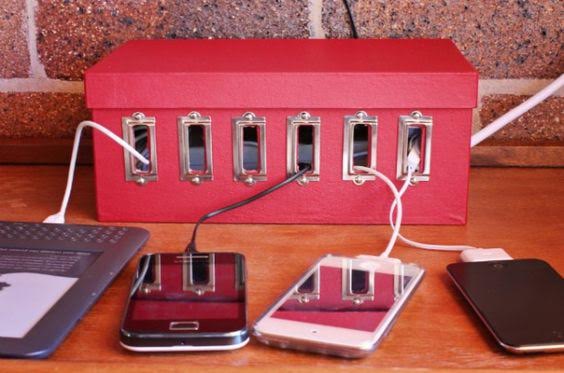
6.Charging Station
Now that technology is the backbone of all our activities, it’s not uncommon to find homes with a whole lot of cables running from room to room. You can keep your house in order by making an inexpensive charging station that will take care of all your tablets and Smart phones so that your dependence on cables is vastly reduced.
To make your own charging station, lay the wrapping paper on the work space inside up. Lay the box front side down and put it in line with the sheet of wrapping paper. Mark the paper two inches from the side edges and front of the shoebox. Next, draw a line over the mark in front and parallel to the edge of the sheet of paper. Mark the sides and ensure the lines are perpendicular to the first one.
Draw a line behind the box and trace it along the back edge. Now, replace the box on its bottom and ensure that the front edge is in line with the one you drew at the back. Once more, trace a line along the back edge, replace the box on its base and check that the front edge is in line with the one at the back. Ensure that you leave the same margin at the back too as you did earlier. Run through the same procedure for the sides, each time ensuring that you begin with the box placed on its base and in the location that you mark.
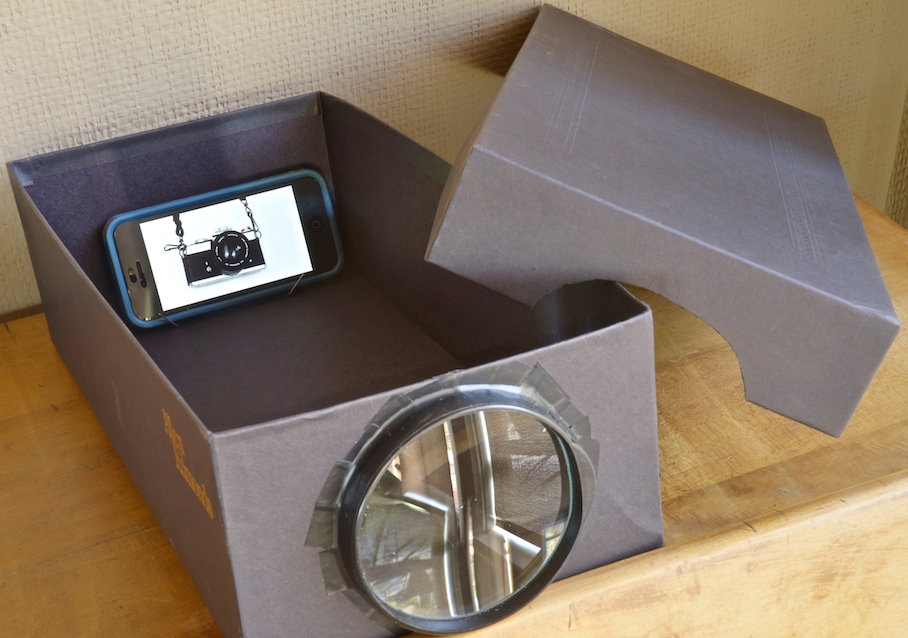
7.DIY Phone Projector
If you want to display your photos on your phone, you can make a really exciting shoebox projector at little or no cost. Use it for movies or videos or just to connect your phone with a speaker.
To make this phone projector, procure a lens inexpensively by removing it from an old slide projector. Begin by ensuring that the device is correctly positioned and at the right distance from the lens. This will ensure that your Smartphone display takes place through the aperture in the shoebox.
Place the shoebox at one side and then figure out where the lens will be fitted by measuring the area to find the middle of the box end. You can draw two lines to intersect. Place the lens over the point where the lines intersect and draw a circle around it.
Cut out the shape of the lens, put it in the hole and set it in position using adhesive putty. Place your phone inside the box, disable the lock screen and turn brightness to full. Either you can secure it in place by using more putty or use a Smartphone case to make it stand for better viewing. Replace the lid and go to your darkened room to check the quality of the image projected. Focus the image by adjusting the phone’s position, and make sure that you reinforce the area with putty to your satisfaction. Now, to be sure, take a couple of photos and check for its accuracy. Next, paint the shoebox black, inside out. Remove the lens and the Smartphone before you paint and replace them only after the paint is completely dry. Now, switch off the lights and project the image after checking that it’s in focus.
If you find the image upside down, turn your phone upside down too and keep the image locked. Whether you use an iPhone or an Android phone, you need to activate the orientation lock in landscape view and then invert the phone. With this, your projector is ready for use.
8.Basket
How about having an inexpensive basket that looks expensive? You can make it from your shoebox. To begin, cut off the top flaps of the box. Heat glue and attach it to one end of the rope to your shoebox. Wrap the rope around your shoebox to keep it tight and secure every few inches. This will keep it in place. Keep wrapping the rope round the box and securing it until you reach 2/3 of the height of the box.
Cut a piece of fabric that can go around the box once. In width, this piece of fabric should be double the exposed area above the rope and one extra inch. Add a drop of hot glue along the top of the rope, and next, work this on the other side of the box. Fold 0.5 inch of the fabric over one edge of the box and press it down on the hot glue. Now, the right side of the fabric will rest against the box, so when you fold it the right side will be exposed.
With the help of a knife, tuck in the fabric tightly against the rope. Repeat on all other sides of the box. After this is done, fold the fabric and put it inside the box. Use extra glue to hold the fabric tightly to the inside of the box.
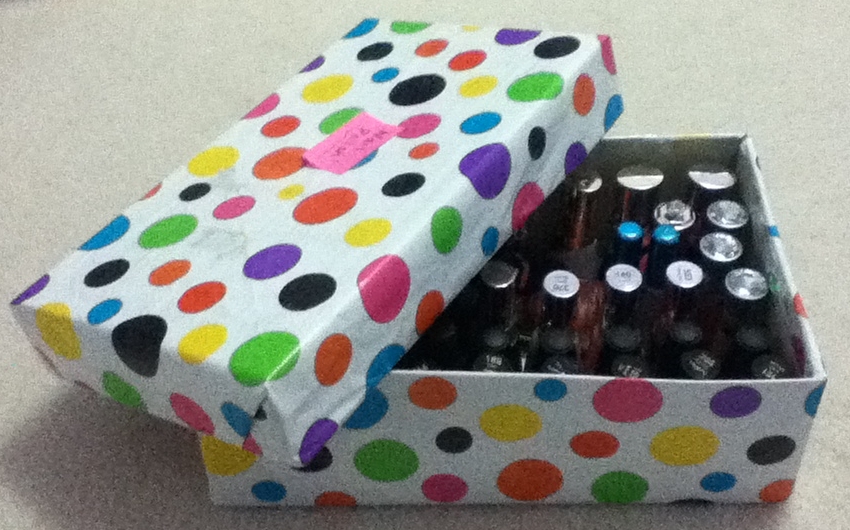
9.Nail Polish Box
If you love wearing nail polish, you’re sure to have a number of nail polish bottles lying around, waiting to be organized. Here’s an idea that will bring order and neatness to your dressing table. You can make a nail polish box from an old shoebox very easily and quickly too.
Use an old shoebox for this project. Measure its depth and width. Cut three rectangular pieces from a cardboard piece. The width of each piece should match the width and its length should match the width of the box. Place each of them in the shoebox, with a little space between them. They will be used for shelves. Buttress these pieces with a little glue at the end of each shelf and position them using craft glue at the end of each shelf and let it dry.
Paint the exterior of the with acrylic paint and let it dry. Let it rest on your vanity so that the shelves are horizontal. Arrange nail polish bottles on each display shelf so that you can see the different colors of bottles from outside.
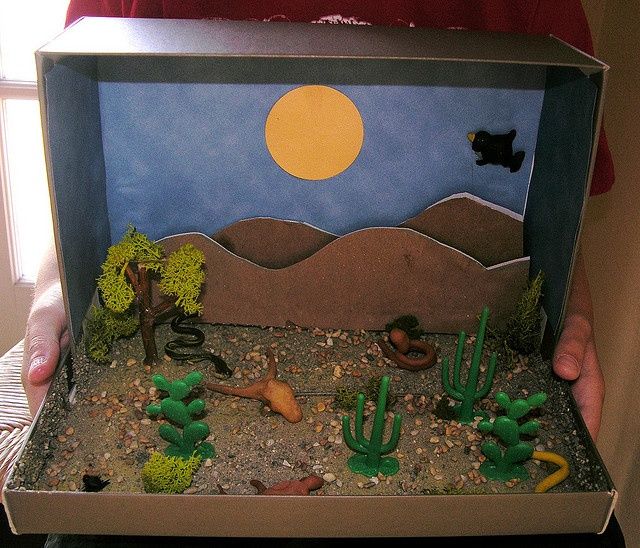
10.Diorama
A diorama or a scenic representation can be made very simply using a shoebox. Not only does a shoebox have a lid that can be closed to protect the model you create, but a diorama is also portable. So, pick a shoebox of the size you want and let your imagination run riot.
To make a diorama, paint the interior of your shoe box in a color that matches the background of your diorama scene. If yours is a desert diorama, paint the top half sky blue and the bottom tan, beige, like the color of sand. Let the glue dry. Cut out the shapes of other background elements and stick them to the background so that they look realistic.
Use modelling clay to sculpt figures to give a good finish to your diorama. After the clay dries, stick these figures onto the floor of the project which is on one side of the box. Shut the lid on the diorama so that it is well-protected.
11.DIY loom
Begin this craft by threading your yarn using straws and tie a knot at one end. Take a piece of cardboard and stick the ends of the knotted end so that it stays in place while you work on the loom. Use the same knotted ends of yarn that hold the straws and tuck one thread from here into each slit. Tie your yarn to the thread outside and start weaving your very own rainbow bracelet.
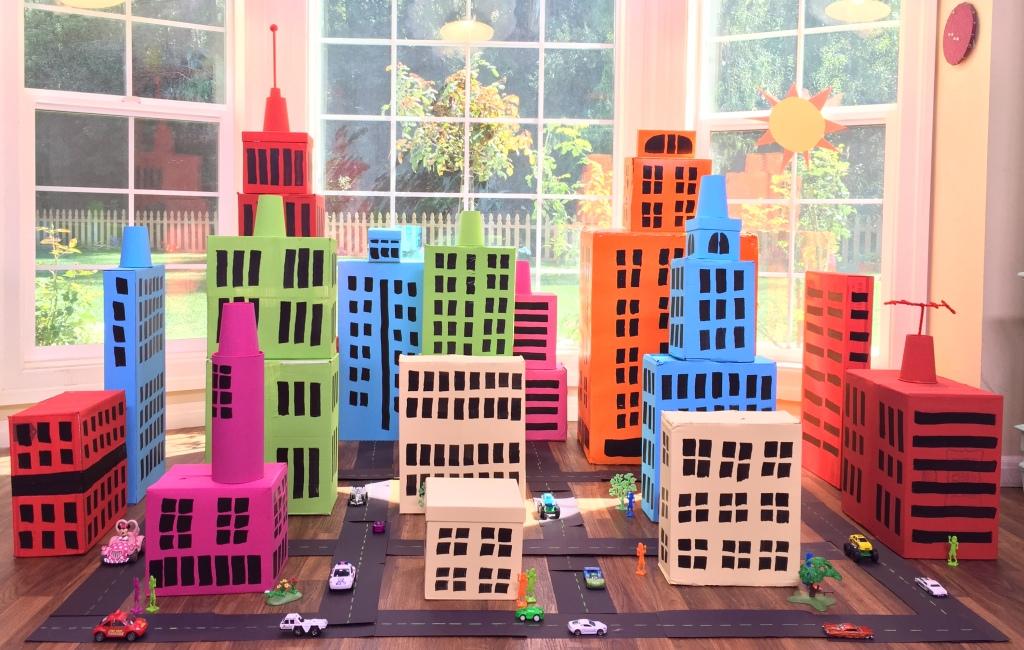
12.Mini City
If you’ve got a curious toddler who wants to know his way around, get his curiosity aroused by creating a mini city for him at home. Apart from sating his curiosity about his surroundings, it will also keep all his toys in one place. You can set up this mini city by collecting as many shoeboxes or any other kind of boxes you may have at home. Cover them with paper and draw building details on them. You can draw these in a variety of colours just to brighten them up. Now, stack them up and arrange them sequentially to give the effect of a city.
13.Sticker Organizer
If you’re a teacher or a die-hard scrapbooker, decorate a forgotten shoebox and put your stickers in order. For this, cut the lid of your shoebox open and set it aside. With the help of a scale, draw a line down the length of the shoebox and mark its midpoint. From the center, mark 2 cm to the right and left and on the opposite side too. Now, join these three points to the middle so it looks like you have a triangle.
Cut the triangle from both sides. Make a crease from one triangle to the other one, using a pair of scissors. Fold both sides outwards and stick it. Next, take cardboard and cut it so that you close the front. Decorate the box with stickers and your organizer is ready for use.

14.File Caddy
Repurpose a shoebox to make a file caddy so that all your journals, files, magazines, etc are organized in one place. Here’s how you can make one for yourself easily:
Measure the length of your shoebox and mark its midpoint on both sides. Cut off a triangular piece. Now, fold both sides of the box and stick the bottom portion together. Cut two extra pieces of the shoebox to serve as the base of the organizer and lay them at the base of the box. Stick the exterior using colourful wrapping paper. Add decorations, if you wish.

And now, here are some crafts kids can use:
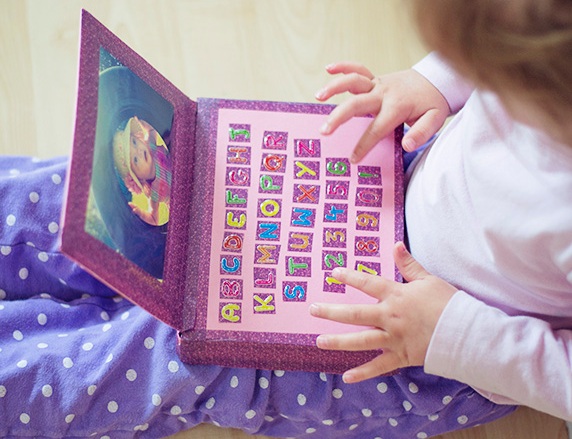
15.Shoebox laptop
To make a laptop out of a shoebox for your little one, cut three sides off from the bottom of your shoebox. Stick the fourth side to the lid so that it can be lifted and dropped easily. Next, stick paper all over it and ask your son or daughter to paint the lid as he or she wants. Cover all the sides with colourful tape and stick a photo on the screen as in a typical screensaver. Then, make a few squares of tape for the laptop keys and stick them but not before you stick a few alphabets and numbers for the keyboard. Use some Velcro circles so that the lid closes properly. Stick a few types of cards on the screensaver with letters and numbers.
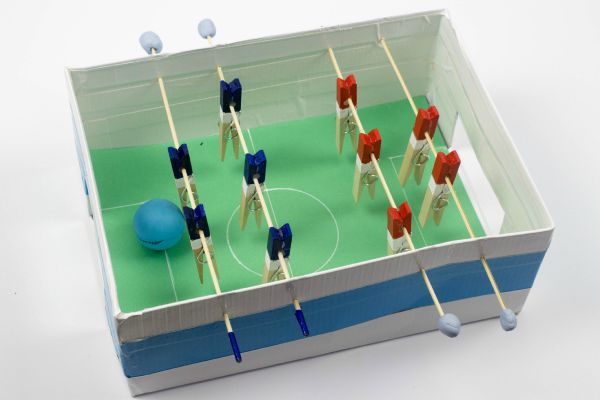
16.Foosball table
Are your kids too small to play football out in the courts? If yes, why not make a small Foosball table for them from a shoebox? They are sure to love it. Here’s how:
Make holes in the sides of the shoebox using a knife or pair of scissors so that they fit your cardboard tubes. The holes should, however, leave enough room for each player to move comfortably. Next, cut rectangular-shaped holes at both ends of the box to make goals. Ensure that the holes are large enough for the table tennis ball to go through comfortably.
Now, cut rectangular shapes from a sheet of thin cardboard for the two players. Draw a couple of football players and color them in bright shades and stick them on the rectangles. Use colored tape to decorate the exterior of the box. If you want to have four players, use a carton. Now, your kids can spend a few hours engaging in this game.
17.Polka Dot Bakery
Begin by sticking decorative windows on the widths of the box. To have windows that you can see through, cut two squares and a door and stick plastic pieces on the holes of the windows. The side of the box that can be opened has a circle of embroidery floss sewn on to it so that when it closes, it latches onto a button that’s stitched onto the top. Use all kinds of trims, ribbon and rickrack to give it a unique look. Use wallpaper for the inside along with polka dot paper to justify its name, Polka Dot Bakery,
For the interiors, use small thimbles for the shelves of the bakery and stick them with superglue. Buttress them with another slide. Also, make the table out of thimbles and a stick it to a flat button so that it stands securely. Now, your kids can play with their very own bakery.
Art Class Shoebox Crafts:
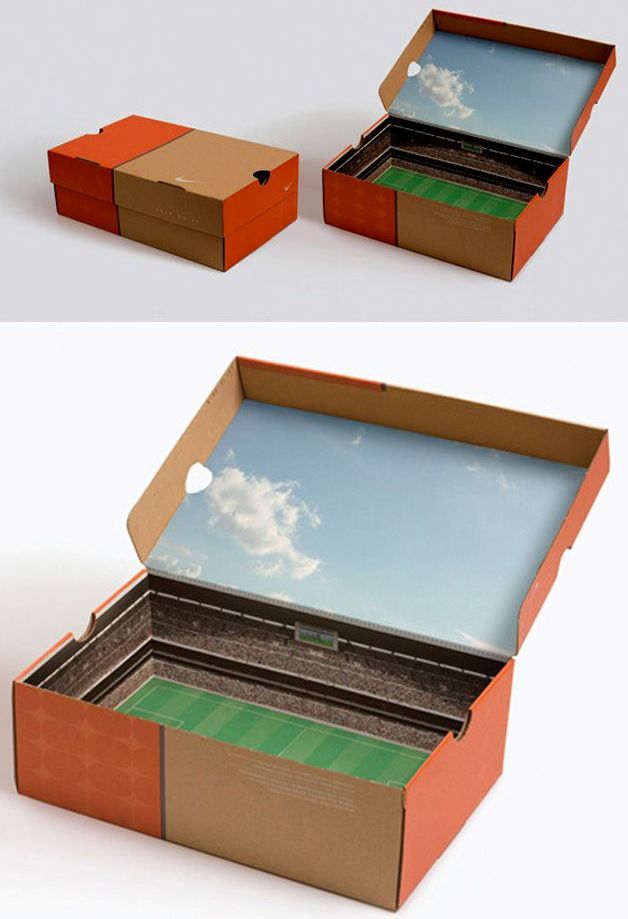
18.Shoebox float
For students of art class, this is an amazingly easy project. Let them choose a theme for their float like super heroes for boys or princesses or mermaids for girls. Ask them to stick colored paper to the float, draw designs on the paper and invert the box. Then, they can stick the lid to the end of the box so that it serves as a backdrop and the float is ready. Ask them to line up the mermaids or action figures on the float so that it seems like there’s a parade of these characters in the classroom.

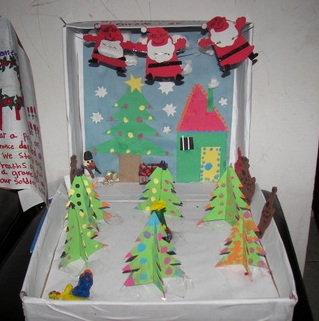
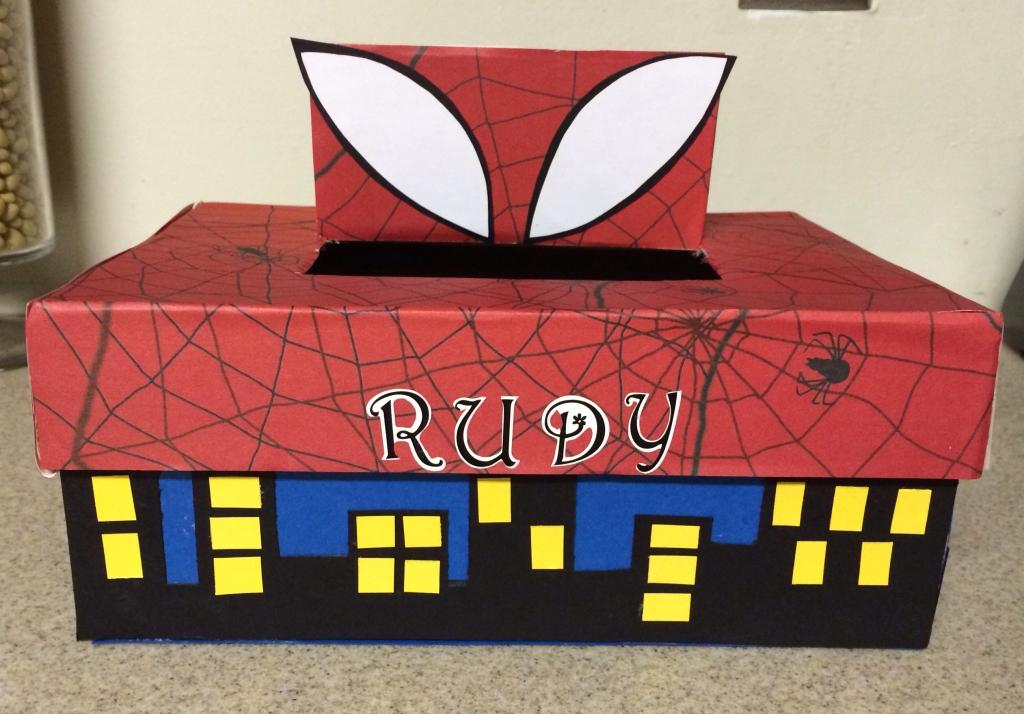
19.Christmas Shoebox craft
For a Christmas shoebox project, ask your kids to pack up their shoeboxes like gifts. Clip on a label that states the child’s name and whether the craft is for a boy or girl. Let the kids fill up the boxes and add in a note about themselves if they want the recipient to know a little about them.
20.DIY Thread Spool Box
For this project, all you need is a shoebox and some nails. Measure the distance between the rods with a spool box and divide the measurements of the box by that number to know how many rows and columns your spool box will accommodate. Now, figure out where you’re going to place the nails at the base of the box and push the nails through. With this, your spool box is ready.
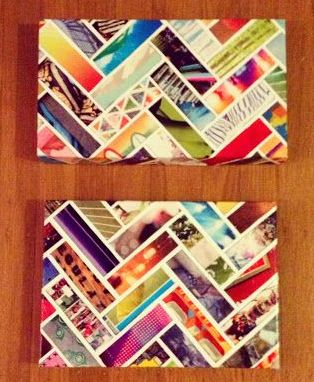
21.Magazine Strip Wall Art
To make magazine strip wall art from a shoebox, go through magazines for patterns that you like. Mark your cutting lines with a ruler. Cut the strips you want and lay them out in the pattern of your choice. Stick the strips to the lid in the pattern you choose, leaving a small gap between strips. Cut out strips for the sides of the box lid too. With the strips stuck to the box lid, coat the lid entirely with glue. Add a second coat of glue after the first one dries. After the second dries, you’re ready to hang it wherever you like.
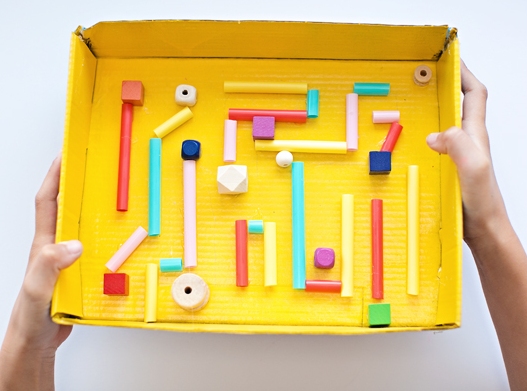
22.Marble Maze
Make your own maze to entertain your kids with just a few supplies. This time, you don’t need the entire shoebox, but just its lid. Make a maze by placing a piece of colored paper inside the shoebox lid and hold it securely with decorative tape. Draw the maze’s outline and mark the entry and exit points. Cut out the entry and exit doors on both sides of the lid. Cut the straws to different lengths and stick them to the lines that you drew earlier using glue so that you create the maze. Once they dry, begin to play by inserting a marble at the entry point and shifting the lid back and forth, right and left so that the marble moves around the maze to the exit point.
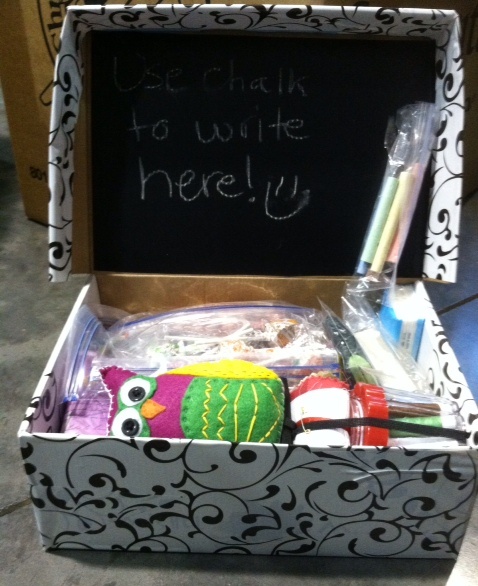
23.Chalkboard Lids
You only need to use shoebox lids for this one. If you have a few of them, it’s a beginning. Now, paint the tops and lids of your shoeboxes with a few coats of chalkboard paint and white chalk. You can also add some coats of decoupage inside the box lids. Now, your chalkboard lids are ready.
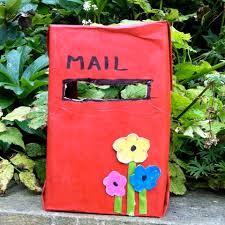
24.Mail Box
To make a colorful mail box, cover the shoebox with construction paper in a way that the lid and the main shoebox are covered and then put together, allowing enough freedom for the lid to be taken off and replaced. Use tape to stick the construction paper to the box. With a utility knife, cut a slit horizontally along the shorter side to serve as a mail slot. Decorate the box with pictures from magazines and stick them on attractively.
Slide in magazine pages, small papers and bits of construction papers into the mail box so that when your child receives it, he will be thrilled. He’ll love opening his mail. Allow him to sit at a table and open his mail while cutting it open with scissors.
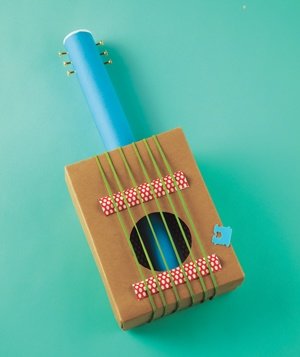
25.Shoe Box Guitar
If your kid loves music, here’s a fun way to get him further into music. Perhaps, he can start his own band too!! Help him make his guitar by painting the shoebox and lid in the color of his guitar. After the paint dries, make a circle in the middle of the lid of the box and put the lid back in place. Stick four craft sticks each one above the other between the hole and one short side of the box. They should be set parallel to the box’s short side.
Next, stick two craft sticks on the paper towel roll at one end of the box. Ensure that they are perpendicular to the paper towel roll. Check that there’s an inch’s gap between the two sticks. After the glue dries, stretch about six rubber bands all around the box on the long side so that they lie over the sticks and the hole. Stick the rear of the paper towel roll without the craft sticks on one side of the guitar. Once the glue dries, you’re ready to play your new instrument. Just strum the rubber bands and sing along.
26.Duct tape Suitcase
Follow these instructions and learn how to use a shoe box and some colorful duct tape to make a miniature suitcase you can use to hold your treasures. Learn how easy it is to make a pretend mailbox using a shoe box. Younger kids especially love this project and enjoy playing with it after it is made.

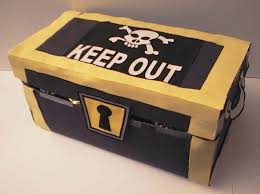
27.Treasure Chest
It’s a nice idea to make a treasure chest for your little one. From this, they can look after all their precious things. So, here goes. Let’s make a treasure chest for a kid: Paint the shoebox black and leave it to dry. Cut foil in strips and stick it to the box. For added decorations, poke fasteners into the box. Print out a picture of a skull, cut it out and stick it on the box. Your kid’s treasure chest is ready.
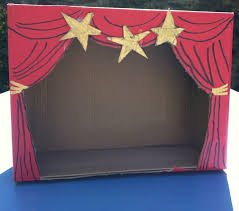
28.Puppet Theater
Cut a hole in the shoebox’s lid so that light enters it. Now, make another hole on the front of the box so that your kid can look through it into this magical wonderland of theater. Measure the height of the shoebox and cut a piece of construction paper of the same height. Place the construction paper in the shoebox so that it lines three sides of the box, and leaves just a peephole open. This is the cyclorama curtain of a real life theater. It won’t have corners so that the scene looks big when seen through the peephole.
Now, decorate the inside of the theater with paints and colors. Once you’ve drawn people, trees and buildings, draw an extra tab on each feature. Cut out each feature and their corresponding tabs. Make a slit in the center of the tab you made earlier. Fold one side of the slit tab forward and the second one backwards, so that you make a base for the features of the construction paper. Put a little glue beneath both sides of the tab base. Stick the features of the construction paper inside the shoebox theater. Peep through the peep hole and enjoy all that you see there.

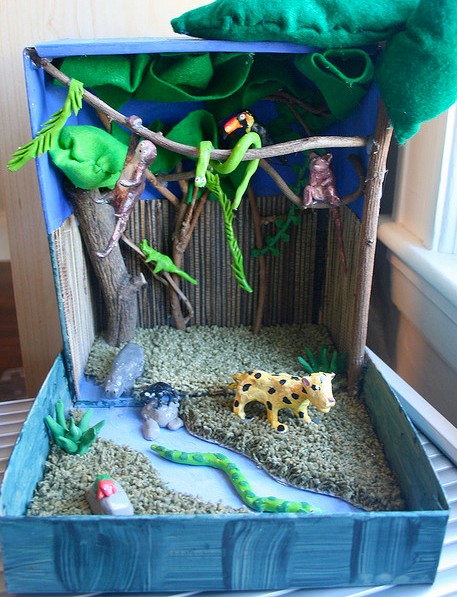
29.Rainforest Habitat
You can create a rainforest habitat for jungle animals, right in a shoebox! Use green acrylic paint to add colour to the inner part of the box. Now, add plastic or paper toy trees here. Use thin glue to paint the bottom of the box and stick dried moss or plastic Easter grass for a rainforest look. Stick toy cougars, lions, birds, frogs and gorillas to give a natural look.
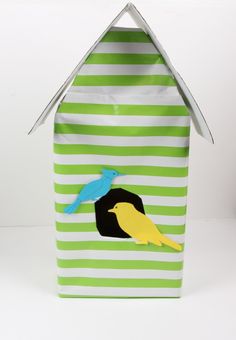
30.Tree house Dwellings
Birds that live in trees are many and beautiful. Here’s a shoebox representation of birds that live in trees. To build a tree house dwelling, paint the shoebox green and add several faux leaves and stems to the surface of the box. There should be shades of green and it should seem as if an individual is looking down from a height into the tree habitat. Use your imagination and create a tree house dwelling.

31.Desert Environment
Everyone associates a desert with miles and miles of sand dunes and a lot of heat. But how about adding the wildlife of a desert too, like lizards, snakes, foxes, rabbits and some cacti too? Paint a blue sky above and sand dunes below in the middle of the shoe box, using acrylic paint. Use play sand for this and create sand dune pyramids. Make the pyramids outside the box and then insert them in the box. Add in more sand around the pyramid dunes for a natural look and add plastic animals so that it looks real.
32.Monster Mask
Cut white paper to make the teeth of the monster. Make holes along the box and stick the teeth there. Cover the rest of the shoebox with construction paper and decorate it the way you want to. Store small items in it in your child’s room or use it at your kid’s birthday party.
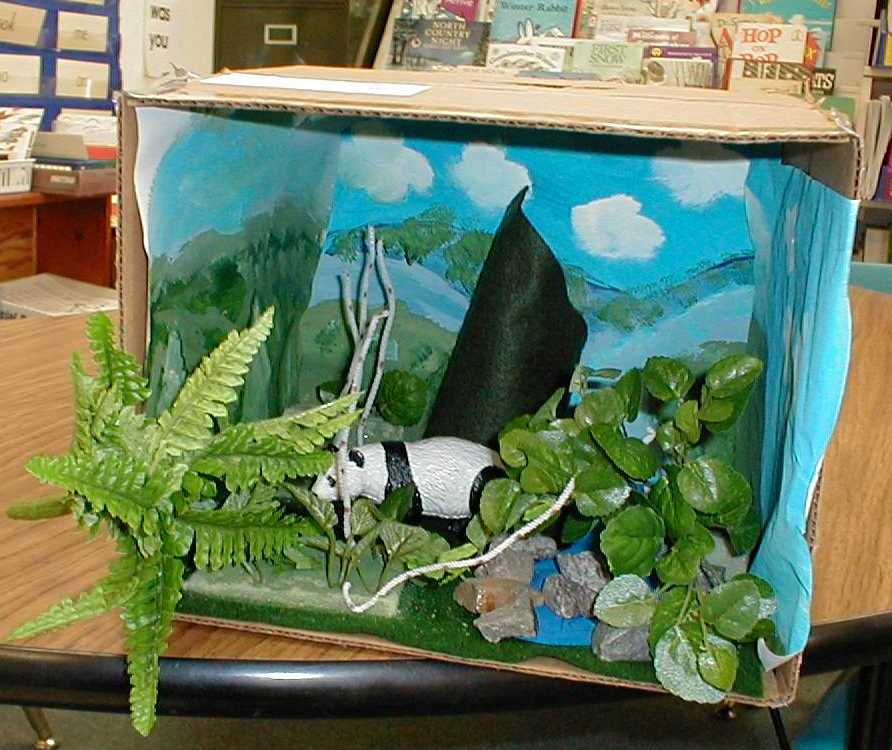
33.Panda Bear Habitat
To teach kids about pandas and the way they live, you can make this craft out of a shoebox. To make it, pour white glue into a bowl and with the help of a sponge brush, spread a light layer all over the box. Next, add light blue tissue paper inside the box. Use glue to stick this to the base of the box and to the right, left and top too. On the fourth side, use green tissue paper. Let the box stand on its side lengthwise so that the green side is on the bottom and serves as grass and foliage.
Now, crumple some newspaper and wrap it in brown tissue paper. Place it in the left corner of the box so that it stands for a mountain. Put pipe cleaners around toothpicks and prick them at the mountain top to symbolize bamboo. From your yard or garden, put together dried leaves, sticks and grass and stick them to the base of the box to give a forest atmosphere. Now, that’s the home of a panda bear.
34.Gift bag
You don’t always have to go to a store to buy a bag for a gift–you can make one inexpensively too! Take off the lid of your shoebox and decorate the exterior sides. Put in your gift, add in some tissue paper and your gift bag is ready.
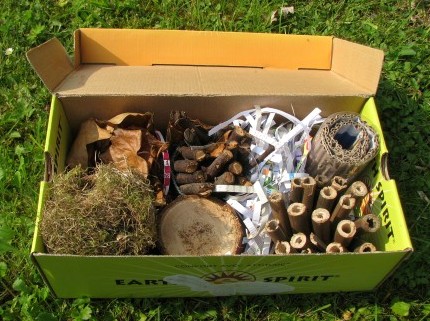
35.Bug Hotel
If your child enjoys observing insects, you can transform an unused shoebox into a bug hotel. Have insect cut-outs or drawings on the outside of the box. Camouflage your bug hotel by covering the space with twigs, leaves and anything else. Stick them to the box or place them all around the shoebox.
Next, cut out a few holes on the breadths of the box so that these openings make moving around possible for the bugs. Blot out the light into the box by turning it upside down. Keep checking on it to see how many more bugs have come to stay here.
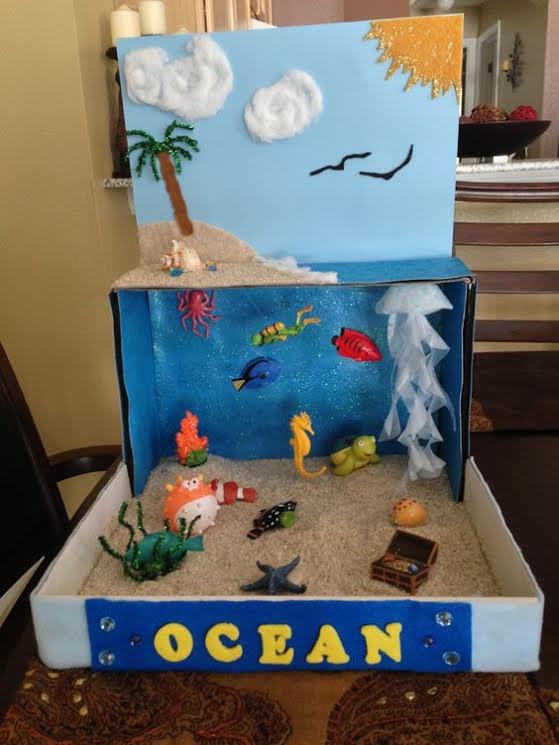
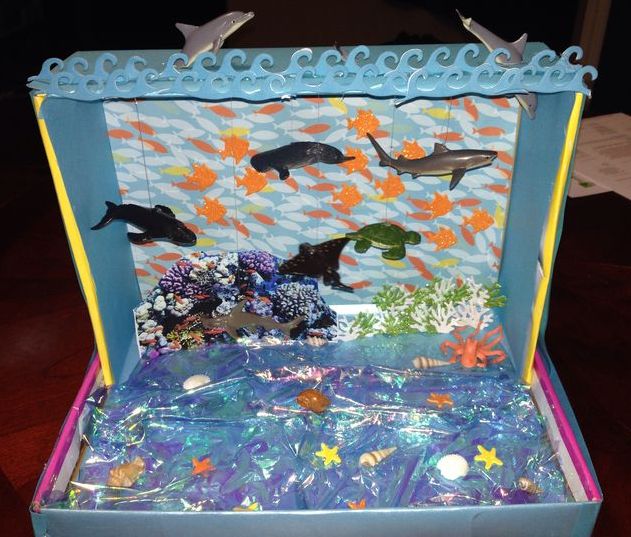
36.Ocean Project
This is a fun and informative project for elementary school kids. Stick a few sheets of newspaper to your school desk so that no paint or glue falls on it. Take off the lid of the shoebox and paint its inside blue. Leave it to dry. Let it lie on its side so that you look into the box either vertically or horizontally. Stick toy ocean animals in the shoebox like lobsters, dolphins, jellyfish, sharks, oysters, clams, marlins, etc. Have a few corals for good effect. Also add some plastic ocean plants to the shoebox like red algae, sea grass and kelp. Your ocean project is complete.
37.Bat’s Cave
Are you planning a spooky party? Here’s some help with making bat’s caves. Make strips of four sheets of black construction paper. They should be of various sizes, about an inch wide. Apply white glue to the strips and spread it over the box. Let the strips overlap the box entirely, inside and outside. Leave the glue to dry for an hour.
Collect a few small stones and pebbles to cover the box’s inside walls. Dot each stone with hot glue and press them against the inner walls of the box to cover them in part. Cover the inside of the top, sides and bottom of the box. You can choose to either have the stones close to each other or at some distance but cover the space entirely. Cut out bat shapes from black construction paper, apply hot glue over its feet so that they hang upside down from the ceiling of the cave.
38.Storage
Why not customize your storage boxes with a little homemade art? To do this, take some paper or fabric and attach it to the boxes with glue. Print out a picture of everything you want to store in the boxes and stick it to the front so you know what’s inside.

39.Off-Season Accessories
When the seasons change, you need to put away your clothes and accessories. Storing them in shoeboxes is an obvious solution–things like scarves, mitts or gloves. Sort out what you want to put away, slather them with chalkboard paint and make a list of what’s inside so that you always open the right box.
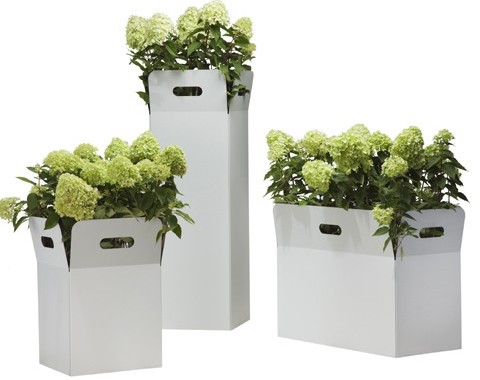
40.Planters
You needn’t buy planters for your garden when you’ve got so many shoeboxes waiting to be used. Fill them with soil, line them with plastic bags and poke holes in them for drainage. Then, plant your favourite plants and watch them bloom.
41.Cat Scratching Zone
That cats need to sharpen their claws against something sharp is well-known. So, why not create that something for them or else they’ll ruin your couch or chair legs? Make a scratching zone for them by using old shoeboxes. Cut strips to fill the lid of the shoebox and stick them on the inside of the lid. Now, your cat’s scratching zone is ready for use.
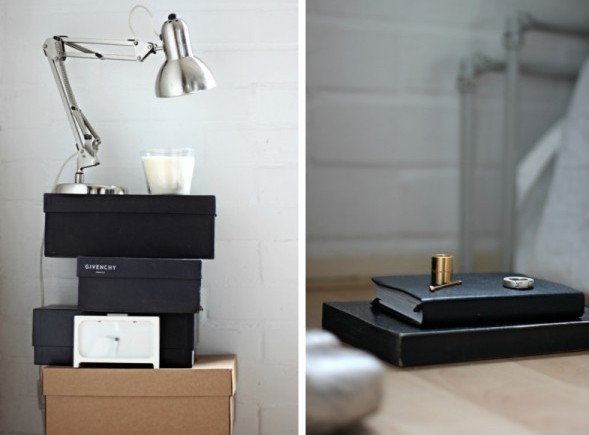
42.Bedside Table
Shoeboxes are available in a range of sizes, and they’re durable too. So, you can easily make a fun and useful bedside table. To make your very own bedside table, take two boxes and paint them with chalkboard paint. Next, put in some shoes, seasonal items or whatever needs to be stored. Make a rough sketch of all that’s inside using chalk and stack up the boxes so that they form a bedside table.
43.Photo Frame
You can easily make a photo frame from a shoebox because of the box’s structured sides. By using some paint, glue and some special photos, you can frame a happy occasion. Mix and match sizes and vary paint colours to add interest to your curated creations.
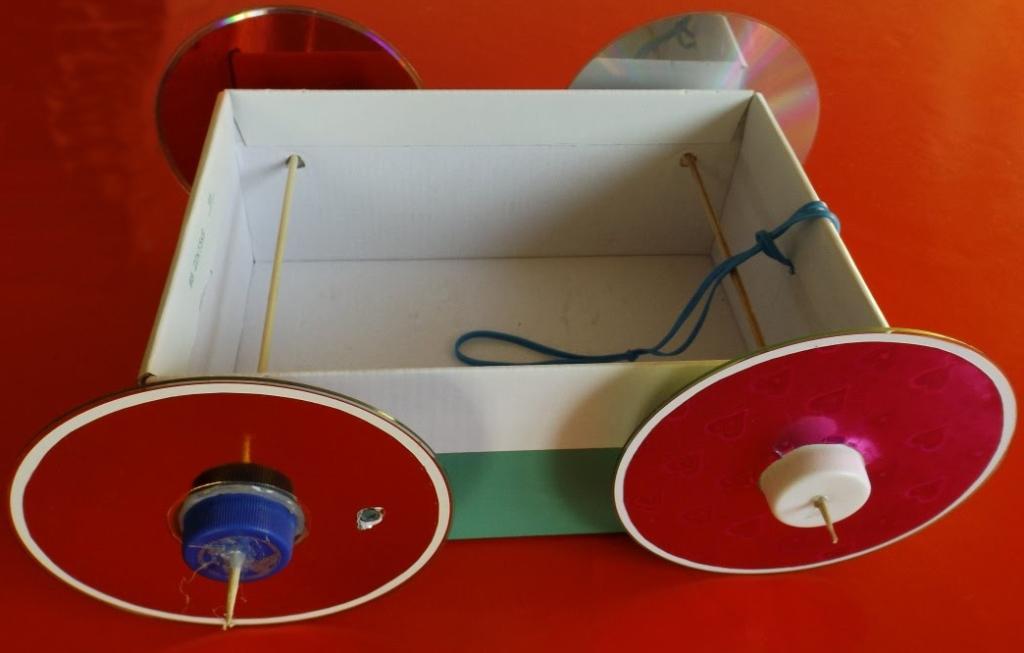
44.Car
Does your kid whine for a car to play with? Here’s one you can make for him. To make his own special car, take off the lid from a shoebox and turn the box upside down. Ensure that the mouth of the box faces your work surface. Put construction paper right round the box in any color that your son loves, using tape or glue.
Color four milk jug caps and stick them on the sides of the box so that they work as wheels. Now, cut out a small plastic up in half, vertically. Ensure that it is about 0.18 liters in size. Invert the cup halves and stick them on the top of the box at one end. These are your car’s windshield. Place the cups in the center and adjacent to each other with their curved edges facing the front of the car. Use yellow construction paper to trace two circles and cut and glue them to the front part of the box for headlights.
Cut a one-inch width piece of aluminium foil. It should be as long and wide as the width of the front portion of the shoebox. Stick this aluminium strip to the front of the car to serve as its grille. Now, cut small circles from the aluminium foil and stick them to the milk jug caps as the midpoint of each Tyre. Use bright colors to decorate the rest of the car with paint or markers.
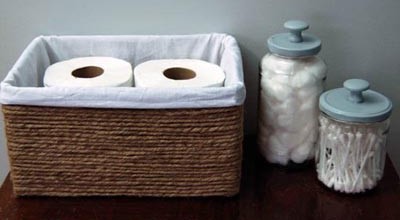
45.Bathroom Extras
Make a customized storage container that you can use in any part of your home. You can make a highly decorative container for your bathroom by using lining fabric and jute rope. Quite simply, let the rope run around the box and let it sit there securely by sticking it to the box with hot glue. By lining the floor and walls of the box with fabric, you will give the container a polished and vibrant look.
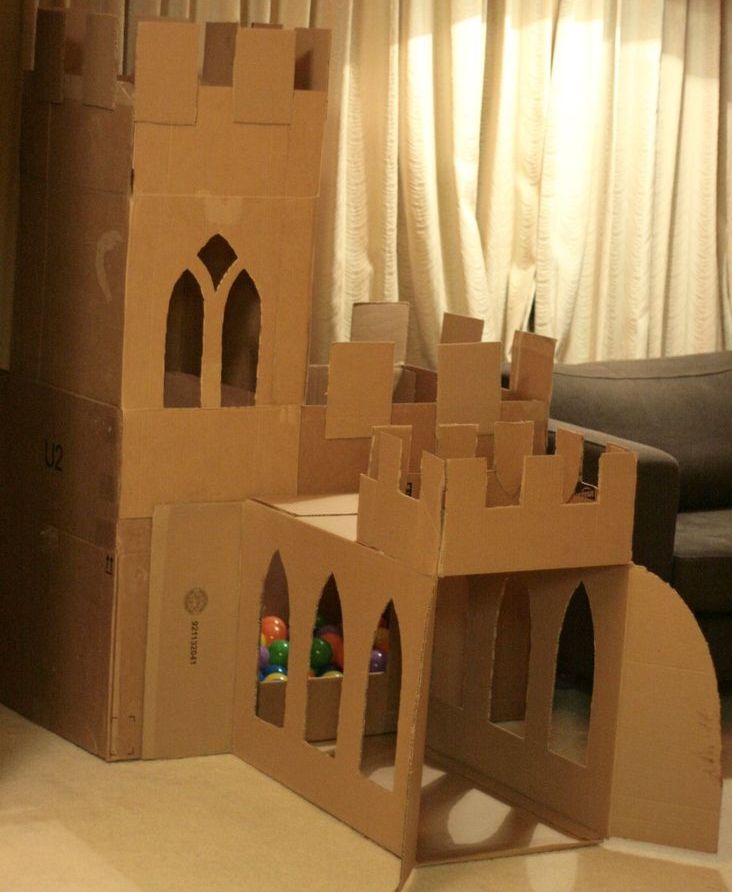
46.Castle
Use an old shoebox to create a castle. For this, take off the lid and make small squares from the box’s walls. Paint the walls brown, liven them up with a brick design and cut out a huge door. Attach it using ropes to make an illusory moat gate along with chains.
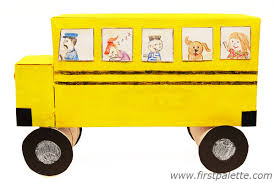
47.School bus
You can make a school bus craft out of a shoe box and art supplies. If your child is about to start school for the first time, you can make the transition easier by providing your child with crafts projects related to school. For example, you can help your child understand what a school bus is by making a school bus with him out of cardboard. Once the bus is finished, your child can play with the school bus to get used to the idea of riding in one.
Glue the top and bottom of a cardboard shoe box together. Allow the glue to dry. Cut out four 4-inch circles from cardboard. Paint the shoe box using yellow paint. Allow the paint to dry. Paint a windshield and a back window using white paint on the short sides of the shoe box. Paint the bus windows on either side of the school bus using white paint. Allow the paint to dry. Paint the cardboard circles with black paint. Allow the paint to dry completely. These will be the wheels of the bus. Glue the wheels onto the bus, placing one wheel 1 inch from each corner of the shoe box.
48.Doll’s house
You can transform your shoebox into just about anything–a charging station, projector, doll’s house or even a fire station. To make your own doll’s house, open an old shoebox and lay it on its side. Next to it, put four cardboard tubes standing upright. Cut out a large rectangle from your shoebox and fold it in half. This will be the roof of your doll’s house.
Cut out a square of cereal box cardboard and place it on top of the paper rolls. Fold a rectangular piece of cardboard in two places to form a reclining type chair. Cut a cardboard tube in half and top it with a small cardboard square to form a table. Next, paint anything you want. Paint the cardboard tubes, paint the cardboard furniture, paint the roof. You can get as detailed here or keep it as simple as you like. You can paint windows in the house or other decor, too.
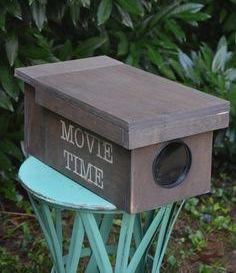
49.Y Shoebox Projector
Use your shoebox to make a basic projector with a lens. You can use this to project patterns or slides on a wall at a pinch or for many other things. To make this projector, first carve out a hole on the box. Check if the inside walls of the box are brightly coloured. If yes, then spray paint them black.
Now, trace the outer rim of the lens on the breadth of the box. Cut out the inside portion of the circle you traced earlier. At the rear of the box, make a small hole for the power cord of your phone.
With this porthole in your shoebox, place the lens with the hole and tape the entire rim of the lens. Ensure your lens is held tightly and that there are no holes between the tape so that light does not pass through. Now, when light enters through the lens, it will get flipped so the picture from your projector will come out inverted. To overcome this, go to your iPhone Settings> General > Accessibility and click AssistiveTouch. You will find a white circle popping out that you can drag around. Click on it and go to Device > Rotate Screen. With this, you can flip apps like Photos.
After you find a good range, fine tune your focus by moving your phone forwards or backwards in the shoebox. For best results, turn the screen brightness of your phone right up and switch off the lights in the room. On your phone, ensure that your power cord enters the hole you cut at the rear and that you stick it with tape.
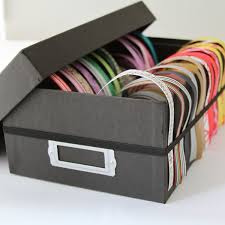
50.Storage for ribbons
Using a shoebox for storing ribbon is an innovative idea. Punch a hole and make eyelets in this box and add a small dowel from wood so that you can slide the ribbon spools onto them for additional stability.
To make this storage box for ribbons, measure the spot where you need to cut the paper by laying out the shoebox as your guide. Now, cut out all the necessary pieces with a paper cutter. Now, put all the pieces on the box, its surface and behind the paper. Put the paper on the sides and lid too.
Once you’ve covered all the sides, use your hole punch and make holes along the lengths of the box. Now, place the eyelets in the order you please in place with the eyelet setter. Place the ribbons on the spool and thread them through the hole. In fact, you can fit two spools adjacent to each other and thread them using the same hole and you’ve got yourself a well-organized ribbon case.
51.File Caddy
If you find your important documents, papers, files, magazines, recipe books and journals strewn all over the place, why not keep them in one safe place? By using your imagination and creativity, you can create your very own file caddy from an old shoebox. If you think you can’t, here are some easy steps to help you along.
Measure the length of the shoebox, and mark in the middle of both sides. Now, cut a triangle from this and fold both sides of the box. Stick together the bottom of the file caddy and cut out two extra pieces of the box to serve as the bottom layer of the file caddy. Now, place these at the bottom of the box. Stick the outside with bright and cheerful wrapping paper. Of course, you could also add decorations like glitter or stickers if you like. With this, you’re done.
Conclusion
Now that you’ve read of at least 51 things you can make for your home and benefit by having them,
perhaps, you will think seriously about repurposing things you don’t really need after they’ve fulfilled their use for you.


