
Boat making, totem poles, canoe crafting, dream catcher, mayflower collage, ship racing, spyglass, paper mache globe, compass making, ship-hand print, aztec diorama, and egg carton ship are the best Columbus day craft ideas for kids.
Columbus Day celebrates the day Christopher Columbus landed on the shores of the American continent to settle European colonists and is usually celebrated on the second Monday of October. There are quite a few Christopher Columbus-inspired things children can do and make to celebrate:
Read More:35 Valentine’s Day DIY Craft Ideas for Kids
16 Best Columbus Day Crafts and Activities for Kids
Explorers
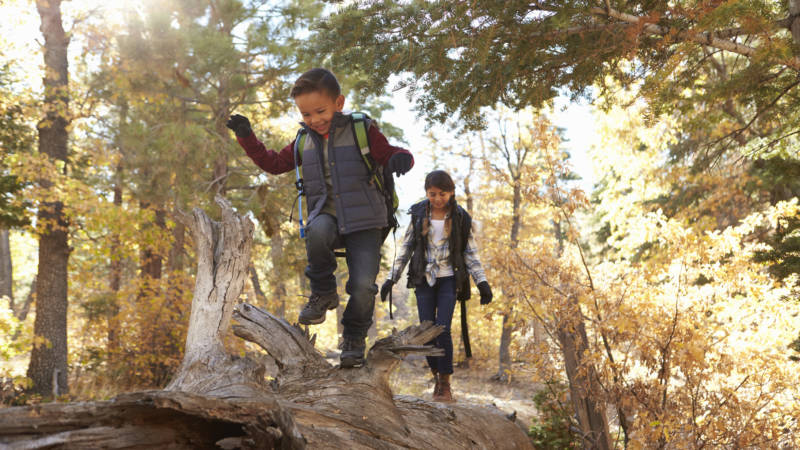
Columbus went sailing to explore unknown areas of the world and discover things never before seen. That’s why Columbus Day is a great day for kids to do some exploring of their own! To start, make sure they have all the tools an aspiring explorer needs, including:
- Notebook
- Pencils
- Compass
- Magnifying glass
- Binoculars
- Disposable camera (optional)
Next, take them to a place they’ve never been and have them explore it. The kids will have lots of fun, and they’ll learn about their environment along the way.
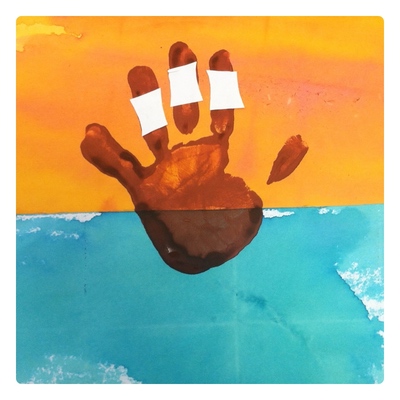
Ship-Hand Print
Make your kids recreate the ships using their hands and a lot of paint.
Read More:36 Thanksgiving Craft Ideas For Kids
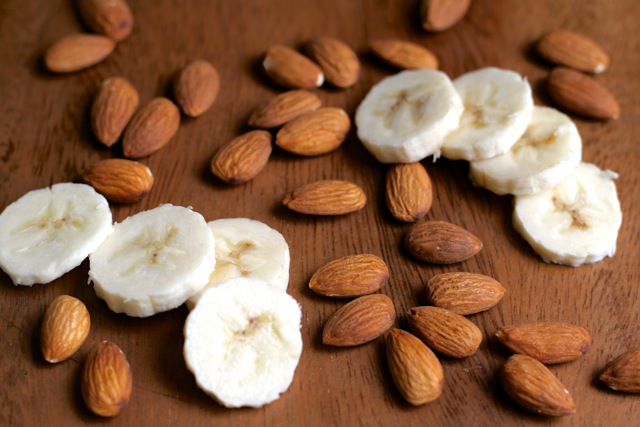
Old World vs. New World
Show your children the difference between the foods eaten by the Europeans and Native Americans by serving them snacks from both. For instance, serve turkey, sweet potatoes and bananas for lunch to celebrate the New World, followed by an afternoon snack of Old World crops like oranges and almonds.
Boat Making Challenge
A very crafty, creative challenge for kids to make a ship with whatever materials on hand, such as bottle corks, wooden popsicle stick and paper. Whoever completes their ship first, wins.
Read More:31 Play Dough Christmas Crafts for kids
Totem Poles
Totem poles are made by the Tlingit Indians on the Pacific Northwest coast, North America. Traditionally, each Totem Pole tells the story of a Native American family’s ancestral spirit guides and family history (shown in human and animal form). They depict the spirits as people, mythical beasts and wildlife revered by the Tlingit Tribe.
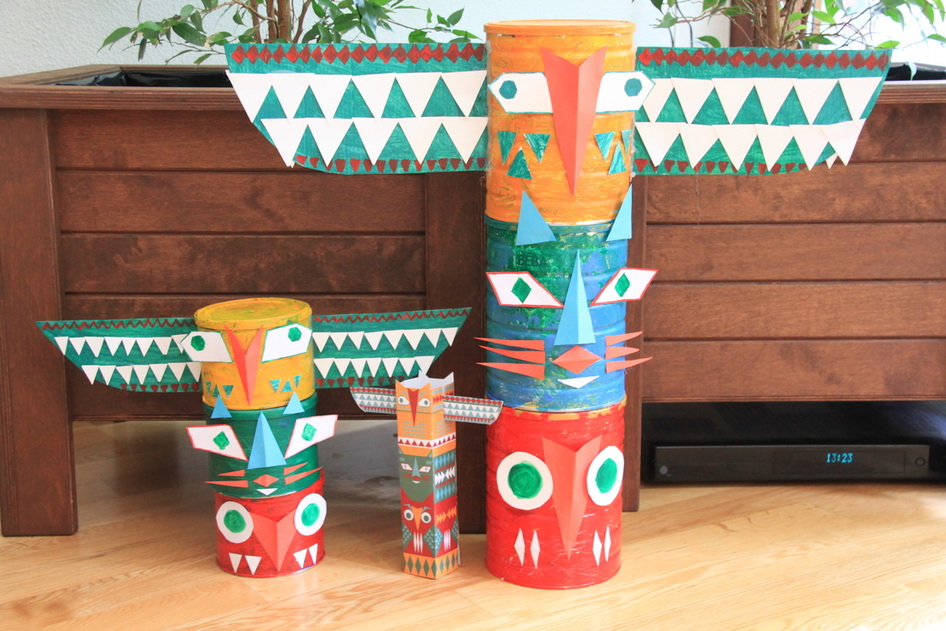
Supplies needed
- paper towel tube
- Crayons, tempera paint or markers
- Brown construction paper (a few sheets)
- Scissors
- Tape, white glue
- 2 popsicle sticks (optional)
What do I have to do
- Draw animal faces onto the brown sheets of paper and colour as desired
- Wrap a piece of construction paper around a paper towel tube to see what size paper you will need.
- Trim the paper to the right dimensions (allow about a half-inch overlap so you can glue the edges easily).
- Wrap the heads around the paper towel tube and glue the seams.
- Draw wings or arms for some or all of the animals. Cut them out and decorate them and then glue them to the back of the Totem Pole.
Canoe Crafting
Canoes were traditionally used by Native Americans to traverse water bodies. You can also use these to have boat races. Supplies needed:
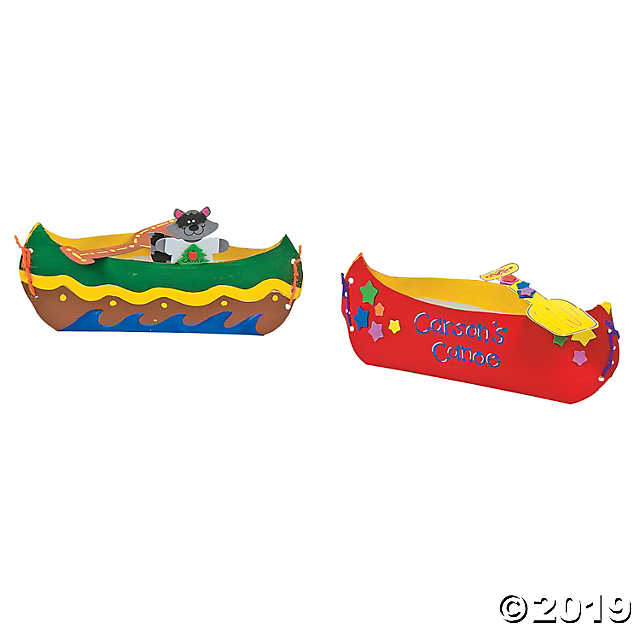
- Brown construction paper or brown paper from a grocery bag
- Crayons, tempera paint, or markers
- Scissors
You will need to
- Fold the piece of construction paper in half the long way.
- About a half-inch from the fold line, make another fold.
- Do this on both sides of the original fold. The paper should now look a bit like a capital “W.” The folds will be the bottom of the canoe.
- Draw a canoe shape on the paper (make sure the folds are on the bottom of the canoe).
- Cut out the canoe shape and punch a few holes on each end.
- Weave through the holes with yarn.
- Push the folded floor flat so that the canoe sits upright
Dream Catcher
Dream Catchers are rooted in Native American lore; they trap bad dreams and let the good dreams filter down to the sleeper. For each dream catcher you will need:
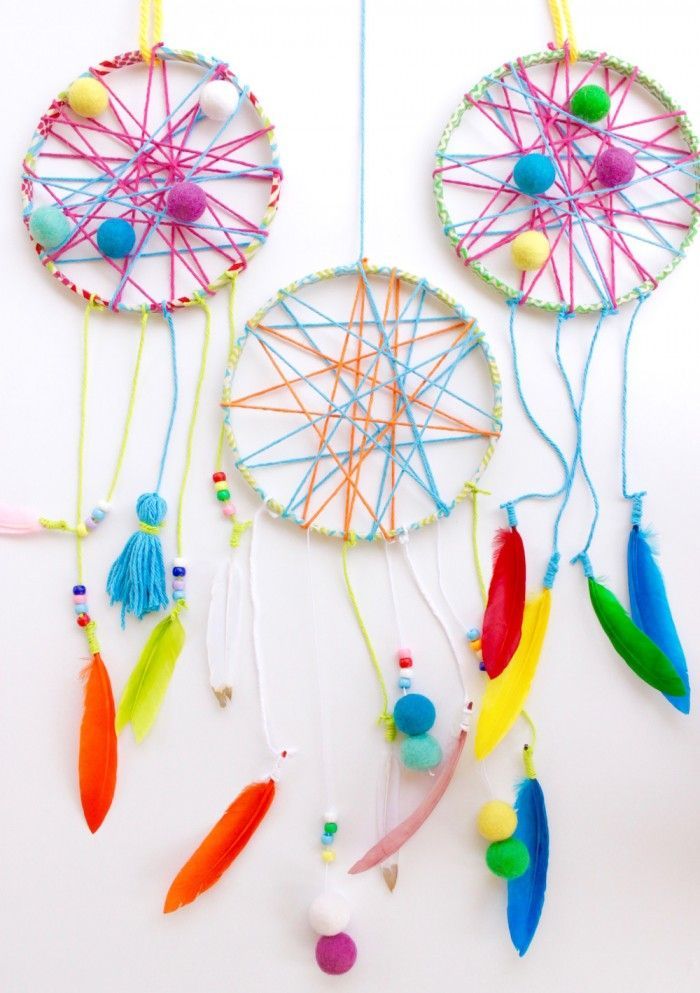
- bendable twig about 1 foot long
- few inches of thin wire
- twine
- beads with large holes
- feathers
You can make a dreamcatcher in the following way
- Make a hoop from the twig by wrapping a short length of thin wire around the overlapping ends.
- Cut a few feet of twine. Tie one end of the twine to the twig hoop. String a few beads onto the twine and push the beads toward the tied end. Wrap the twine around the other side of the hoop.
- String more beads on the twine and then wrap the twine around the far side of the hoop. Repeat until you have a web-like design.
- Tie a short length of twine on the hoop. String beads on it and then tie a feather onto the end. Repeat this as desired.
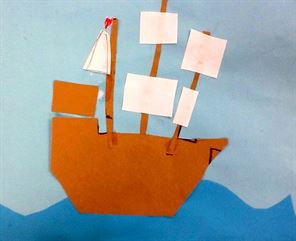
Mayflower Collage
Recreate the famous, triple masted ship using scraps of paper, cardboard and other materials.
Read More:Christmas DIY Crafts for kids
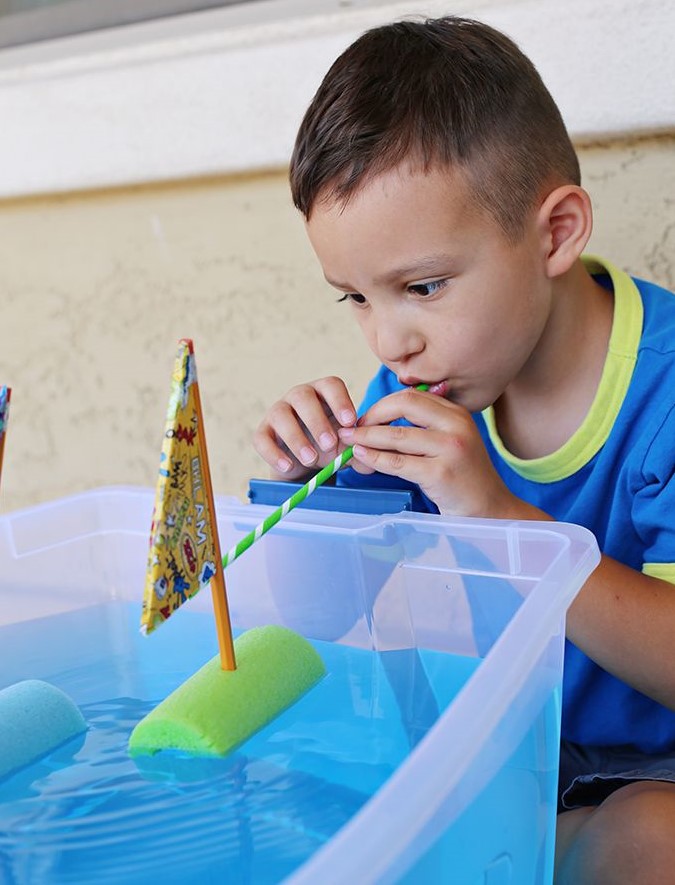
Ship Racing
Make the kids create a lightweight ship each with balloons attached to them and make them race in a fish tank or a pool. The first one to cross the line (and reach the Americas) wins!
Trace Columbus’s journey from Spain to San Salvador on a globe or a map. It was a long tiresome journey for the 100 sailors of the Nina, the Pinta, and the Santa Maria. Weeks passed with no sight of land. The food, water, and supplies were almost gone. Most of the sailors were restless and wanted to turn back. Columbus cheered them by talking about the riches they would find into the Indies. Finally, signs of land appeared. Start a roleplaying journey with the kids to teach them the story.
Create a SpyGlass
Make this spyglass telescope and you will be the first to discover the new world from your make-believe perch in the crow’s nest of the Santa Maria or spot pirates roaming the seven seas.
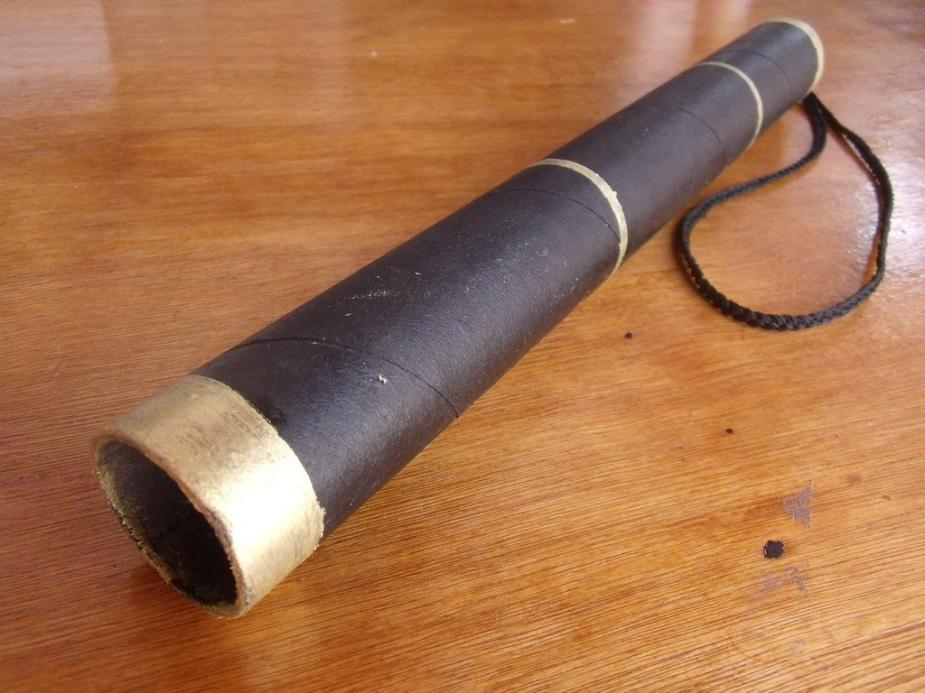
Materials
- Paper tube (paper towel or gift wrap)
- Construction paper
- scotch tape
- stickers for decorating
Instructions
- Cover the outside of your paper tube with construction paper.
- Add a narrow strip of coloured paper around the end that has the glass (plastic wrap).
- decorate your spyglass as desired
Paper Mache Globe
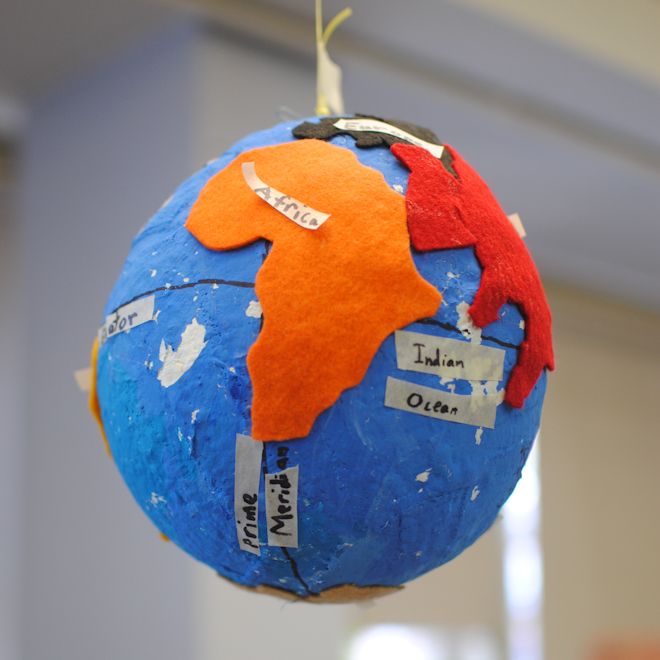
You will need
- Balloon (You will need one for each globe. Pick a bright colour)
- 2 cups of water
- 1 cup Flour
- Shredded paper. (While newspaper sheets work well but I recommend using old white paper. It makes it easier to paint with fewer coats)
- Twine or String
- Blue and Green Paint
Directions
- Start by mixing Flour and Water to make a paste
- Blow up your balloon
- Tie your twine to the top of your balloon. – You will need to hang it to dry.
- Dip the paper strips in the mixture and wipe off excess (The paper strips only need to be moistened)
- Stick to balloon and smooth out.
- Check for holes and patch them. Have your child make sure to check for spots that aren’t covered. This is where having a bright-coloured balloon comes in handy. You don’t know how hard it was to find holes in white balloons.
- Leave to dry overnight.
- Pop the balloon.
- paint it and have fun
Compass Making
You’re gonna need this if you deice to have a treasure hunt. Materials needed:
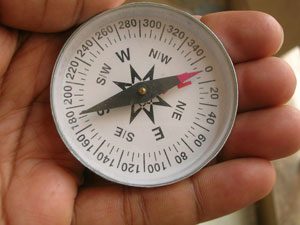
- ferromagnet
- needle
- paper
- water
- bowl
- Scissors
Instructions
- Rub one end of the needle on one side of the magnet 30 times (the north pole if your magnet is labelled). Always rub in the same direction. You can make a compass using a needle and a magnet.
- Flip the magnet over and rub the other end of the needle on this other side 30 times. Again, rub in the same direction.
- Cut a circle about 2 inches in diameter out of the paper.
- Carefully thread a needle through the paper circle twice, but not all the way through, so that the needle lays flat on the paper.
- Place the paper and needle on the surface of the water. Both ends of the needle should be above the floating paper circle. You can make a compass using a needle and a magnet. It’s very simple and fun. Learn about magnetism.
- Watch it slowly rotate and then stop.
- Check the directions with a compass. One end of the needle (the one that you rubbed on the north pole of the magnet) should point to the north and the other south.
- Label the circle with the corresponding N (north) and S (south) directions.
You now have a homemade compass!
Aztec Diorama
Ask the kids to research the life of the Aztecs: their customs, clothing, what they ate and ask them to recreate a scene of them meeting Columbus for the first time ever, using a cardboard box.

Egg Carton Ship
Time to take the fun into the bathtub with you own floating ships to play with.
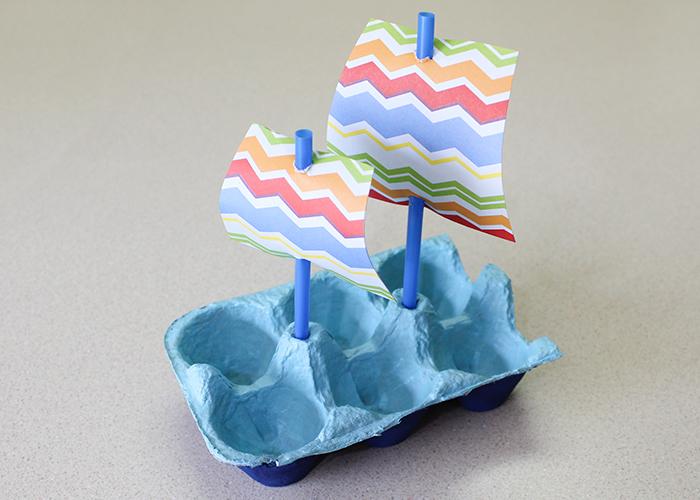
Materials you’ll need:
- Paint Brushes
- Acrylic Paint, multiple colours
- Thin sticks
- string
- (3) Egg Cartons
- Scissors
- blue tack
Instructions
- Paint the sails first, as whatever you want
- Cut the tops off the egg cartons and poke holes in the raised parts
- Push a thin stick through, secure with blue tack and tie wit a string since helps secure the mast
- Cut out some sails and flags and glue on the sails and staple on flags.
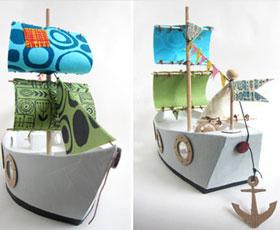
Ship Fleet
Use this craft to make cute little replicas of the Nina, the Pinta, and the Santa Maria. You will need

- 2 or 3 empty half-shells
- Clay
- melted wax, or plaster of Paris to fill shells
- 2 or 3 round toothpicks
- enough white paper for sails
With assistance, fill empty shells with clay, wax, or plaster. Stick a round toothpick into the clay, wax, or plaster. Cut triangular sails and stick on toothpicks.
Sources
familyholiday.net


